
Reading controller inputs
Finally some buttons to press

In order to make testing and sourcing parts easier, I decided early on that I would base the controller communication protocol on the Sega Genesis controllers. This meant being able to use common D-subminiature ports that are still available today, and don't visually evoke any particular system very strongly. If I had decided to make it compatible with NES controllers instead for instance, people would be all "wait aren't those NES controller ports on the front of your console?" and they'd be tricker to source too. DE9 sockets were used by not only the Genesis, but also Atari systems and various other home computers between the late 1970s and early 1990s.
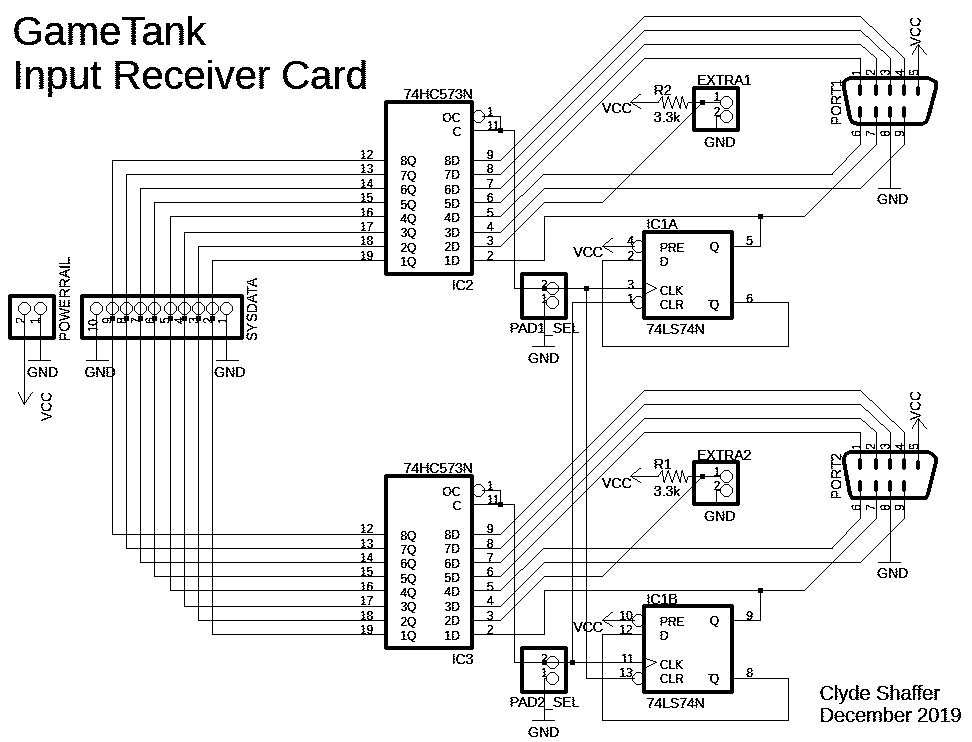
The controller cable has 9 wires. Two of them are power supply (5v and ground), one of them is a select line, and the other six each report the state of a button on the gamepad. When the controller is plugged in, these button signals are at 5 volts while the button is not pressed. When a button is pressed, that button's signal is pulled to ground. On the receiving end, the six button data lines connect to the inputs of an octal latch IC.
However, the gamepad has more than six buttons. Four directions, three action buttons, and the start button. So how are all of these buttons mapped through only six signals? The aforementioned select line is controlled by the game console, and determines which set of gamepad buttons the six data lines are mapped to. In the Gametank, a flip-flop IC is clocked by the read signal that is asserted when the running program is reading the controller state. On consecutive reads to the same controller port, the select line will be alternated so that the software can read all the buttons simply by reading the same address again. To make sure that a controller port is in a known state when reading the data, reading a controller port also resets the select state of the other port. So when reading port A, the software should begin by reading port B to reset it.
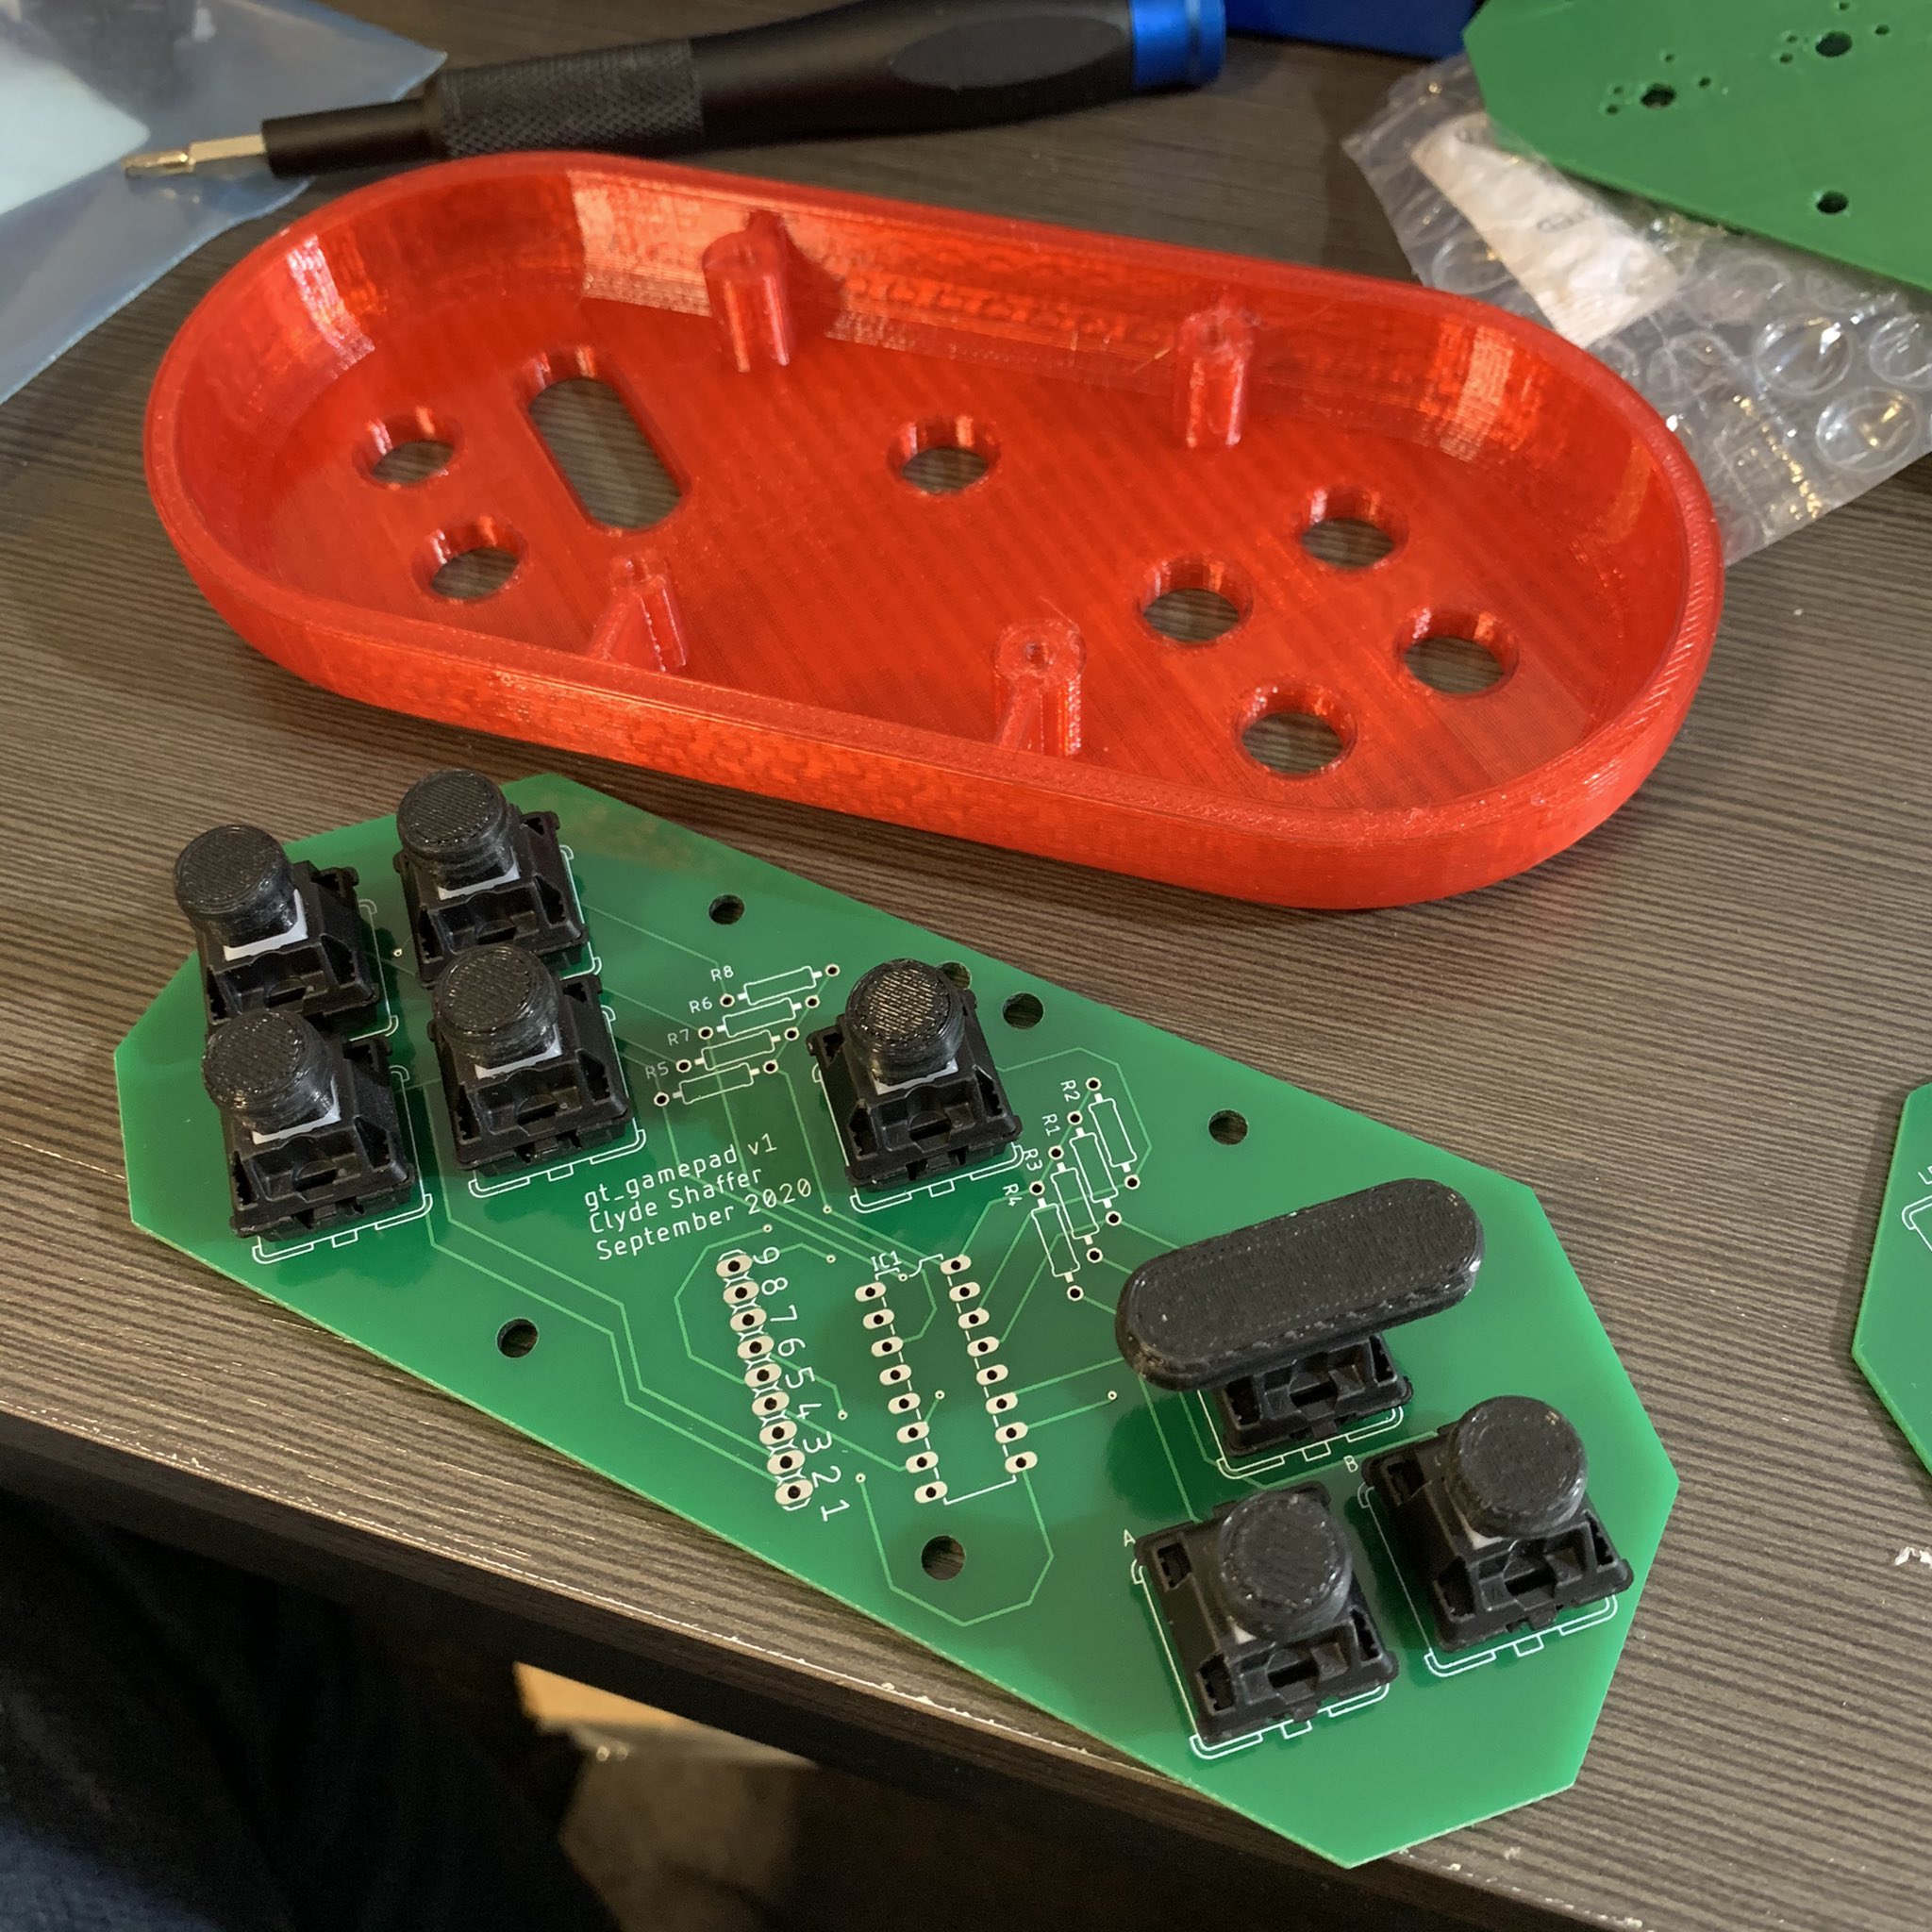
The Gametank's controller design is meant to be robust, simple to assemble, relatively easy to 3D print, and moderately comfortable. Somewhat unusual for game controllers, the Gametank uses mechanical keyboard switches. While keyboard switches typically have a further throw distance than gamepad buttons, the activation point for the keyboard switch is actually close to the typical bottoming-out distance for gamepad buttons. Using Cherry MX Clear switches provides tactile feedback for activation, while the extra distance provides a softer stop for the player's thumbs and reduces fatigue. While this might not be a very high bar by modern ergonomic standards, I actually find the Gametank controller more comfortable than the first-party Genesis controller for extended gaming sessions.